
Yield: one 9-inch cheesecake
Recipe: 163/200
“Back to Baking”, pp. 284
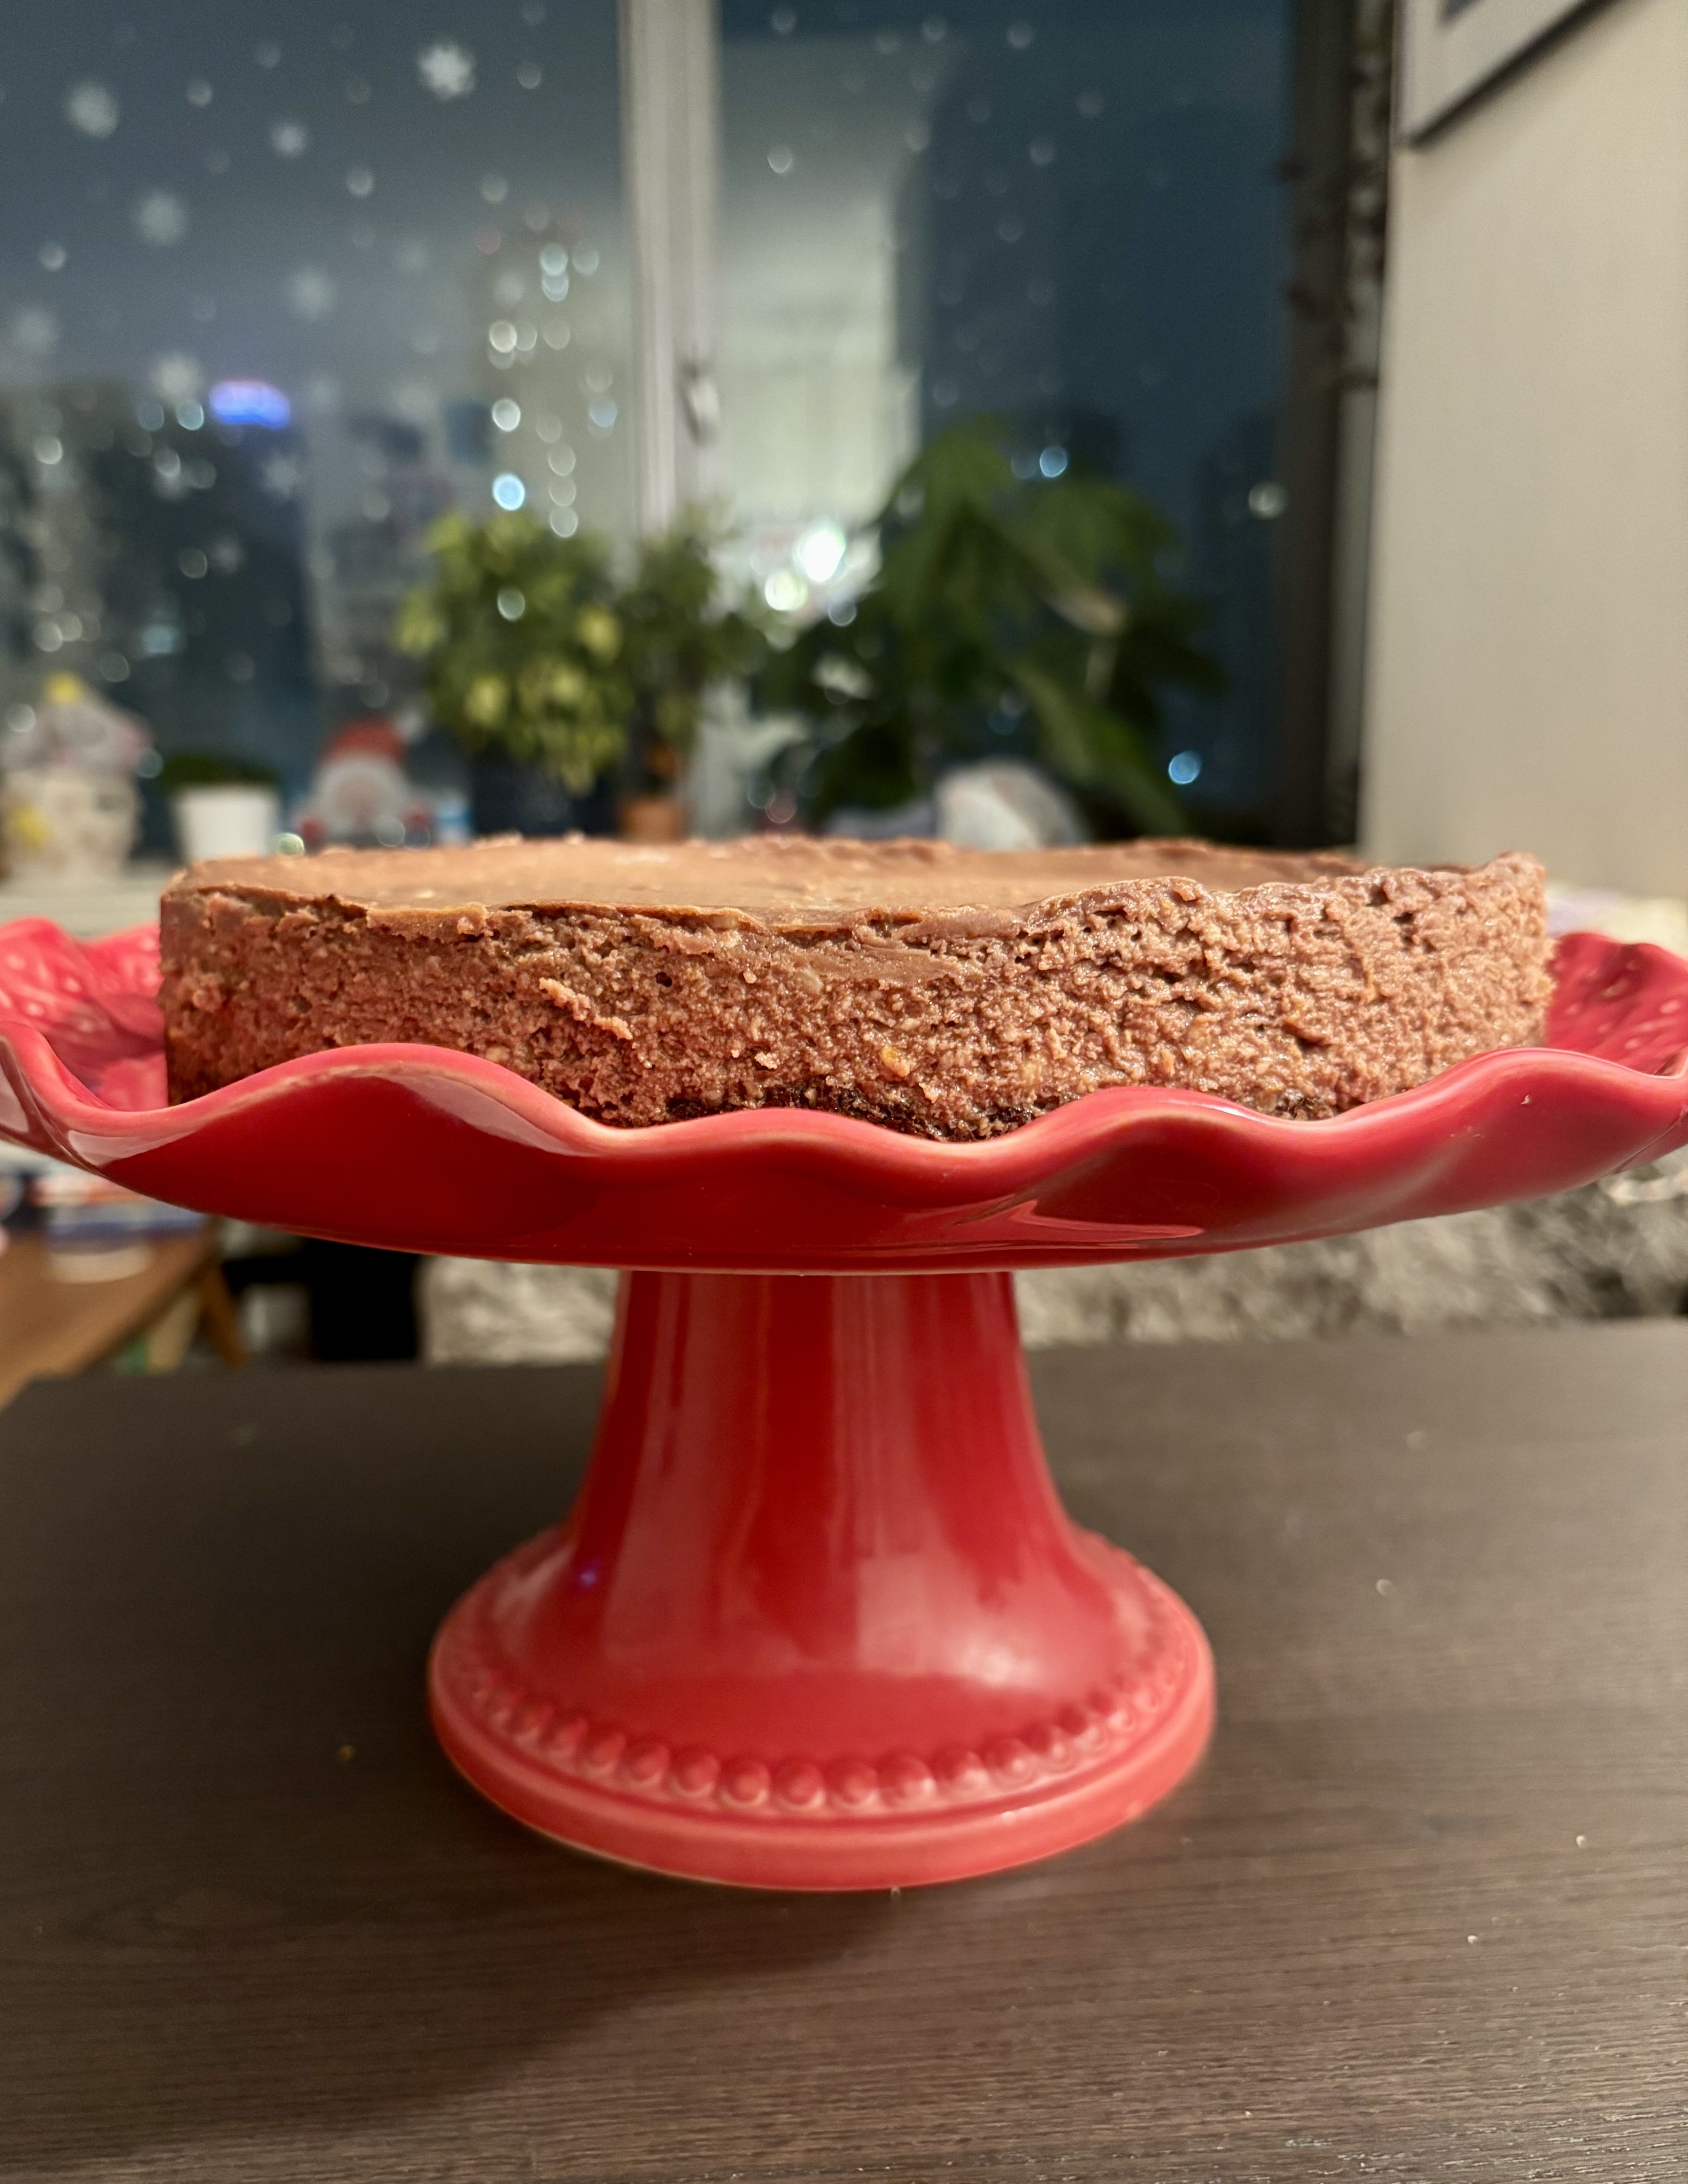
For the third week in a row I was on a roll to make new recipes from the cookbook. I am only now getting around to posting it, but at least I kept the momentum going. What usually prevents me from trying new recipes is not having an ingredient or two, especially less common ones. One such ingredient that is required for many of the egg-free desserts in the book is soft tofu. So I finally decided to make the effort and bought two blocks so I wouldn’t have this excuse anymore! The first recipe that I decided to do with this was the chocolate orange cheesecake. I do love myself a nice cheesecake and chocolate is my number one weakness, but I was never a big fan of the combination of chocolate and orange. This was a perfect opportunity to try once more.
Ingredient for crust:- 1 cup rolled oats
- ⅓ cup packed dark brown sugar
- 3 tablespoons cocoa powder
- Pinch salt
- ¼ cup unsalted butter, melted
Ingredient for filling:
- 2 packages (8 oz, 250 g each) cream cheese, at room temperature
- 1 cup sugar
- 1 tablespoon finely grated orange zest
- 4 oz (120 g) silken or soft tofu
- ⅔ cup sour cream
- 1 teaspoon vanilla extract
- 5 oz (150 g) bittersweet chocolate, chopped and melted
I was looking forward to making this recipe because, frankly, it sounded fun. Mainly using the food processor to blend the ingredients of the crust, bake, and then do the same for the filling. Seemed pretty straightforward! Making the crust went very smoothly, even with the assistance of my little helper, but I had considerable problems making the filling. This was entirely due to my tools and not the recipe itself. My food processor was entirely too small for this mission, which is the first time in all my baking years that this is a problem. After much frustration and many attempts, I accepted that I would have to finish blending the ingredients by hand in a large bowl. As a result, even though the texture of the cheesecake came out mostly as expected, there were still some small lumps of unblended cream cheese. I strongly suggest that you not make this recipe if you do not have a normal-sized food processor or perhaps an immersion blender which might also work. Thankfully, this did not change the taste of the cheesecake, it is just visually slightly less appealing.
The cheesecake was really lovely. First thing that I noticed as Anna mentions in the cookbook is that there was no crack at the top of the cheesecake, since normally this is caused by the eggs. The crust was really lovely-looking, darker brown colour with some bits of oats shining through, and the cheesecake filling looked appetizing. I think the top layer of the cheesecake looks really nice as well. Now for flavour and texture. The orange flavour was a bit more pronounced than I personally enjoy, but truly still very enjoyable. My husband, who is not opposed to the chocolate and orange combo as I am, really enjoyed the flavour and did not think that the orange was overpowering, so keep that in mind if you like this duo! The texture was really pleasant as well, truly like a normal cheesecake made with eggs. I would definitely make this recipe again, maybe with a bit less orange zest for me personally. And definitely, with a bigger food processor!
Directions: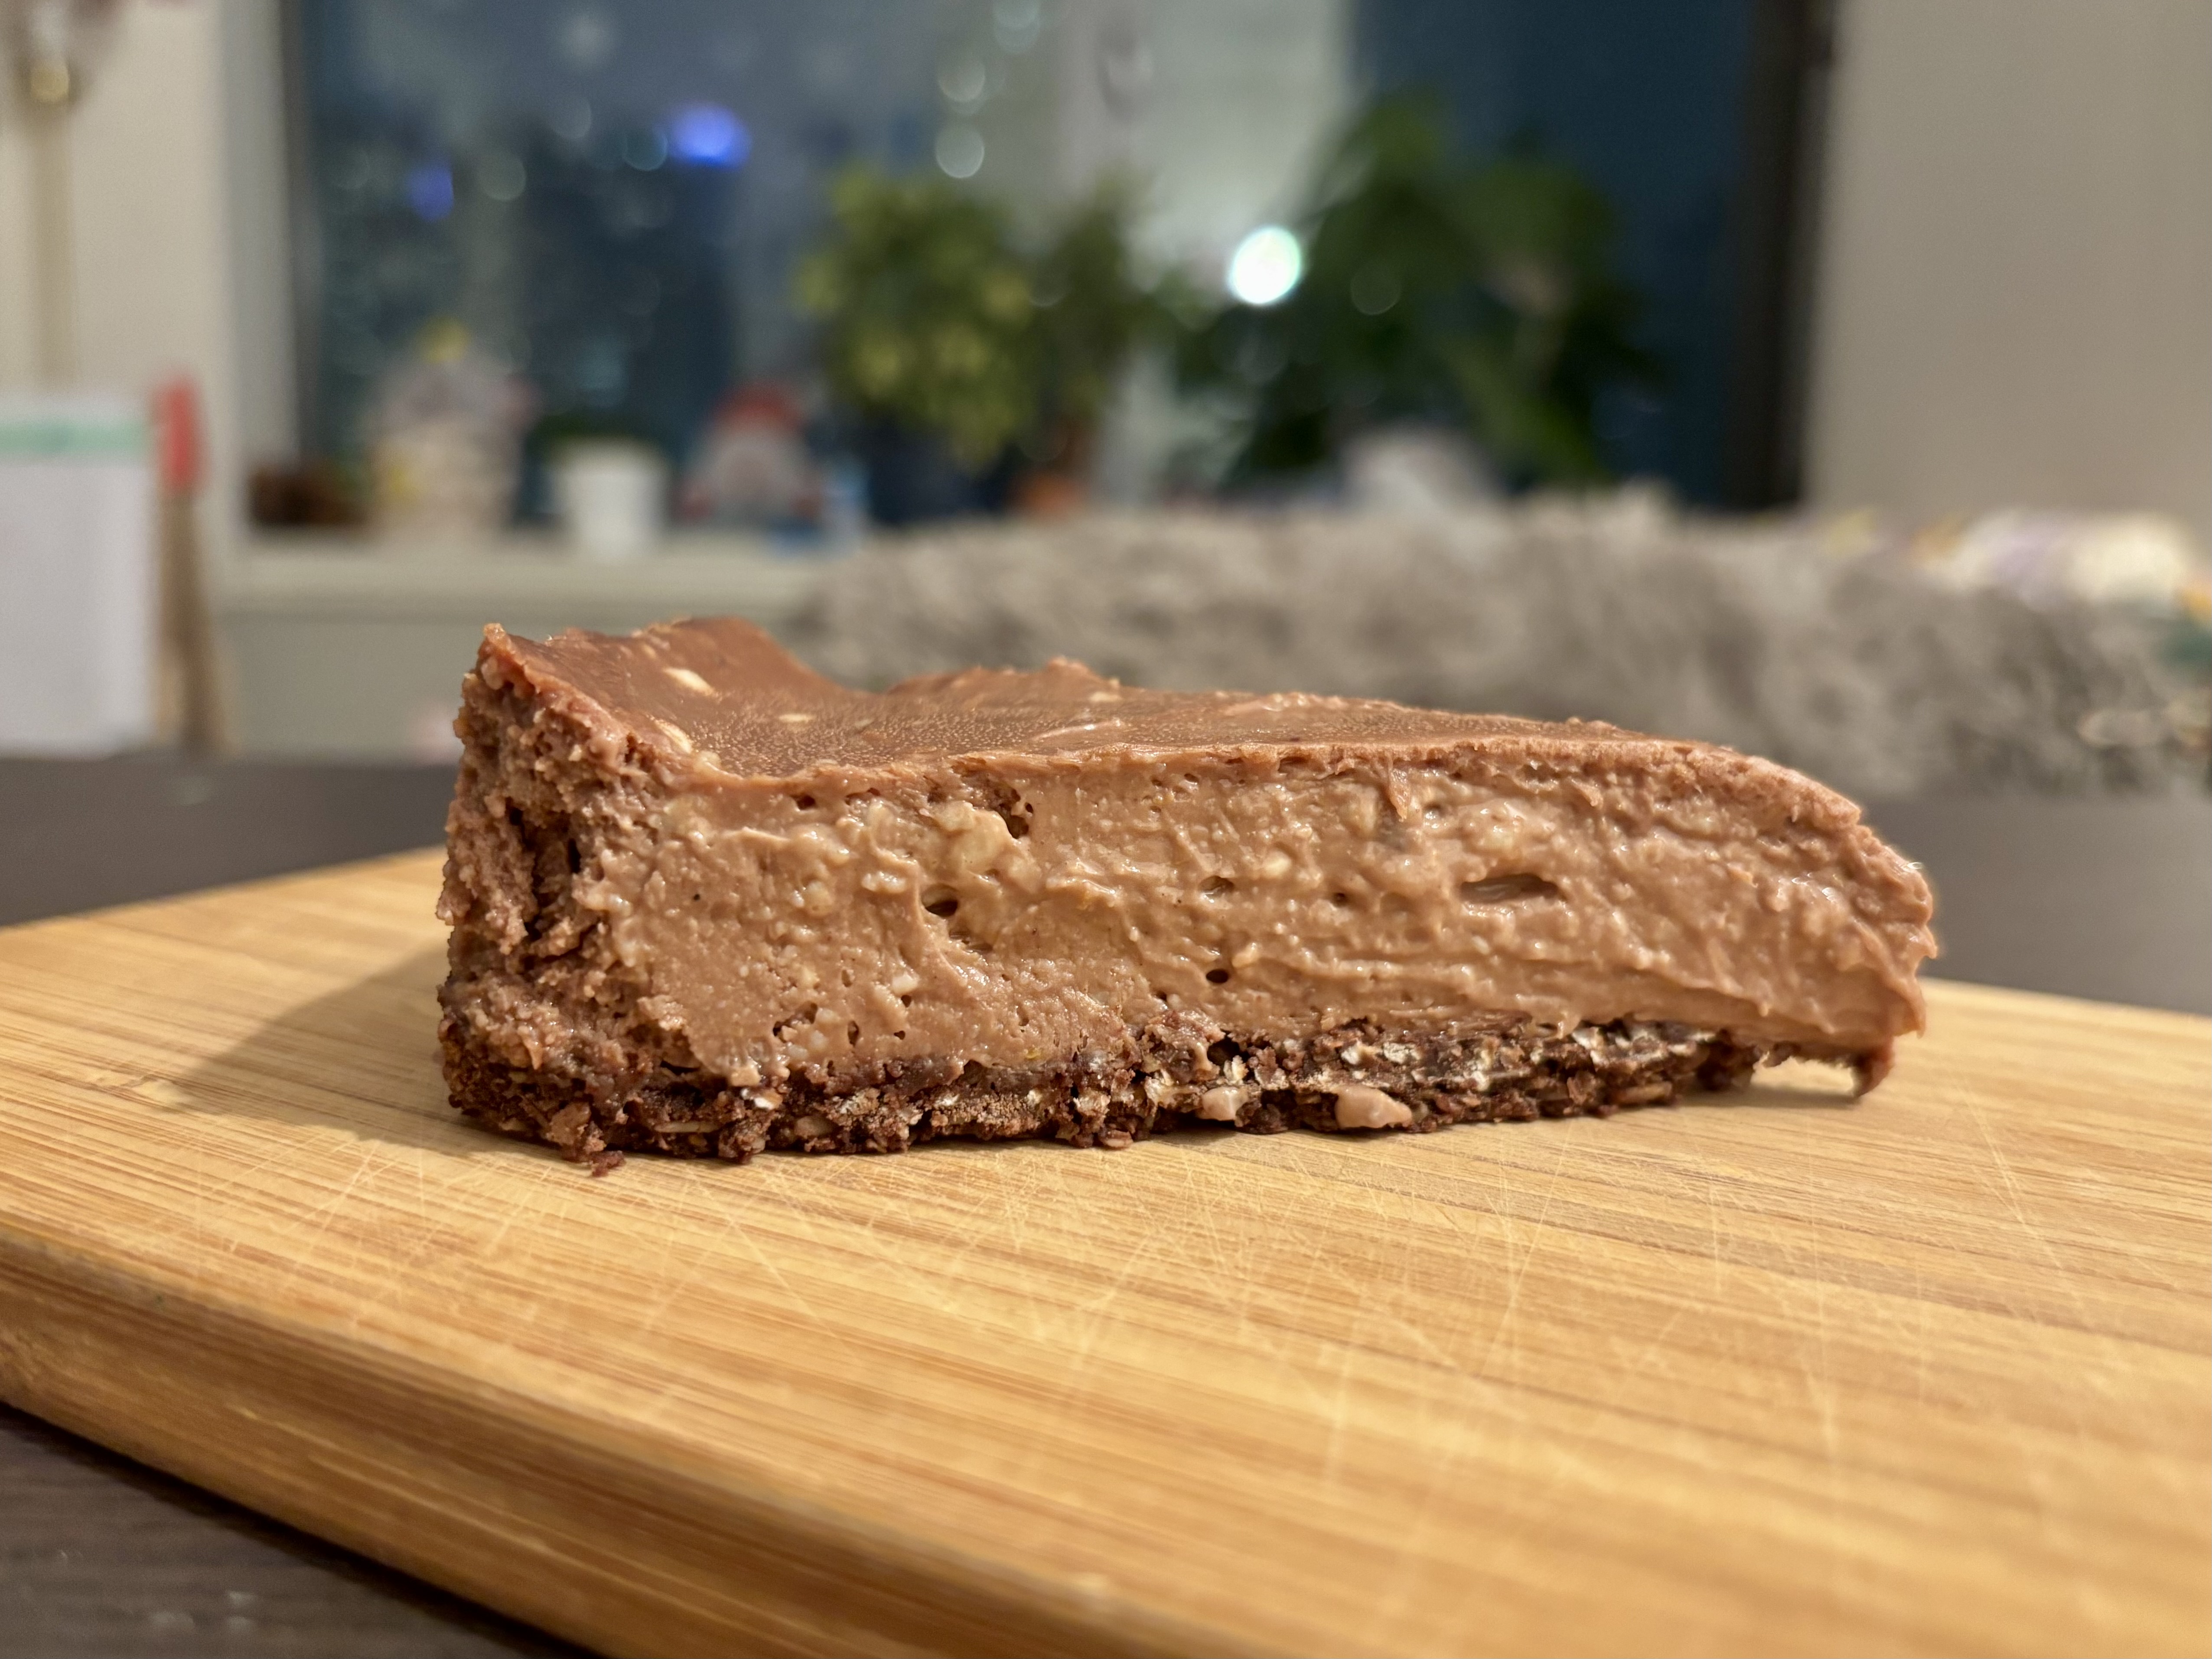
Happy baking!
Valerie
