Yield: one gingerbread house, about 9×5 inches and 7 ½ inches tall
Recipe: 165/200
“Back to Baking”, pp. 252

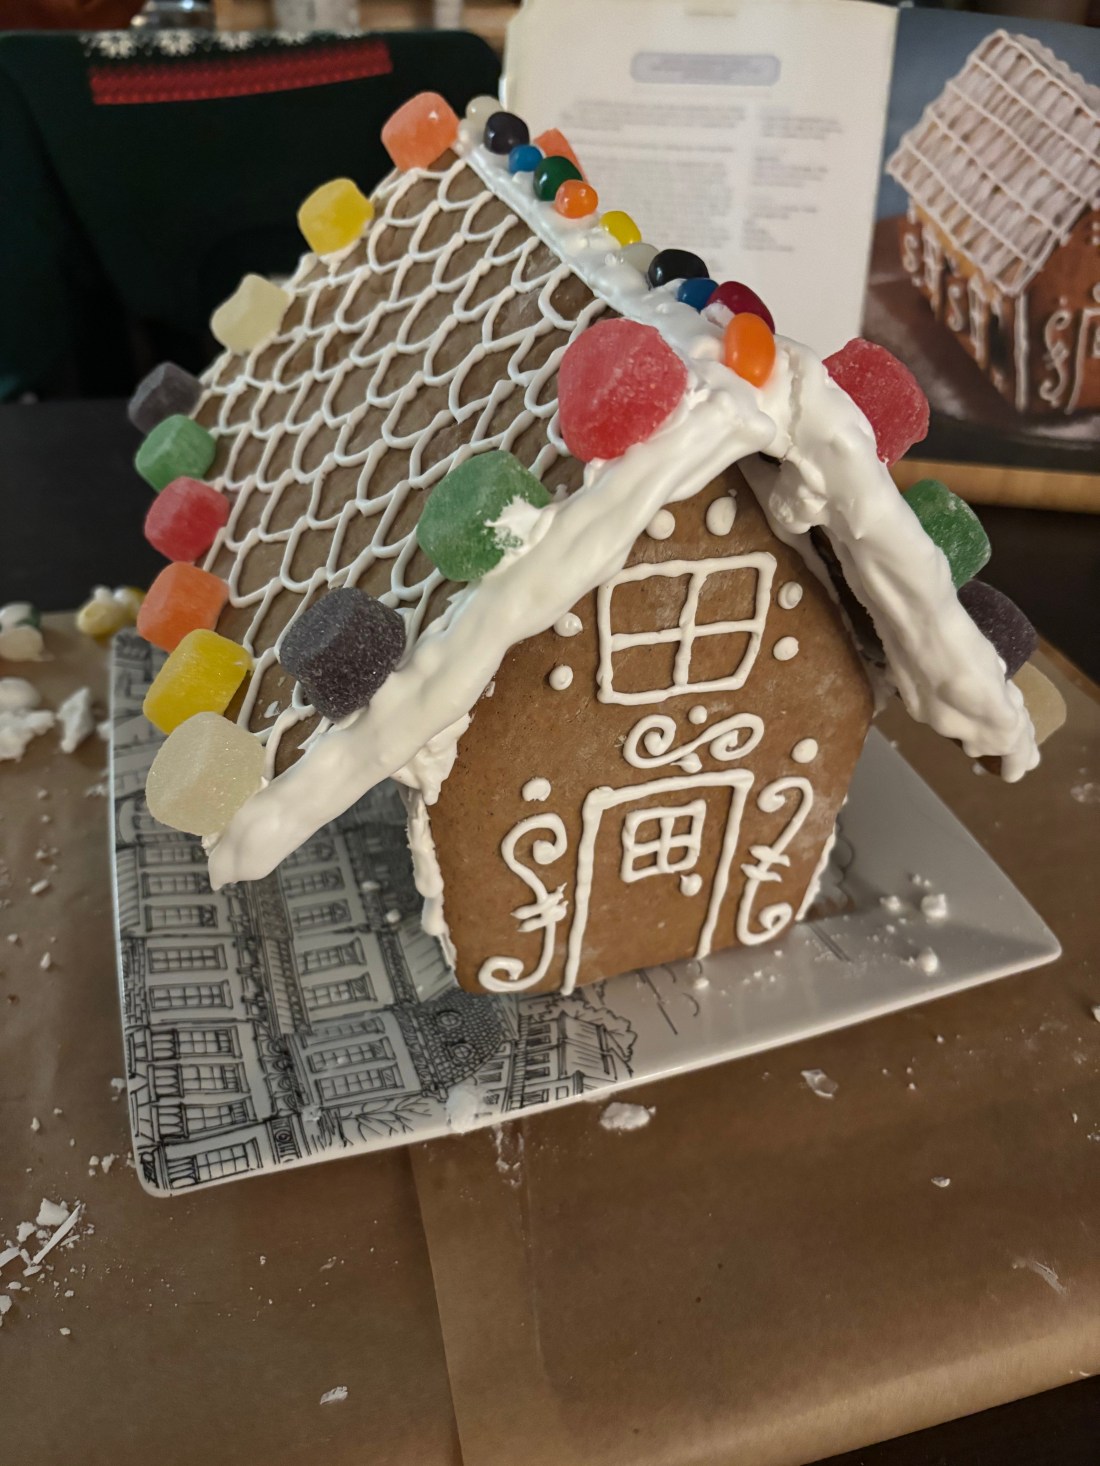
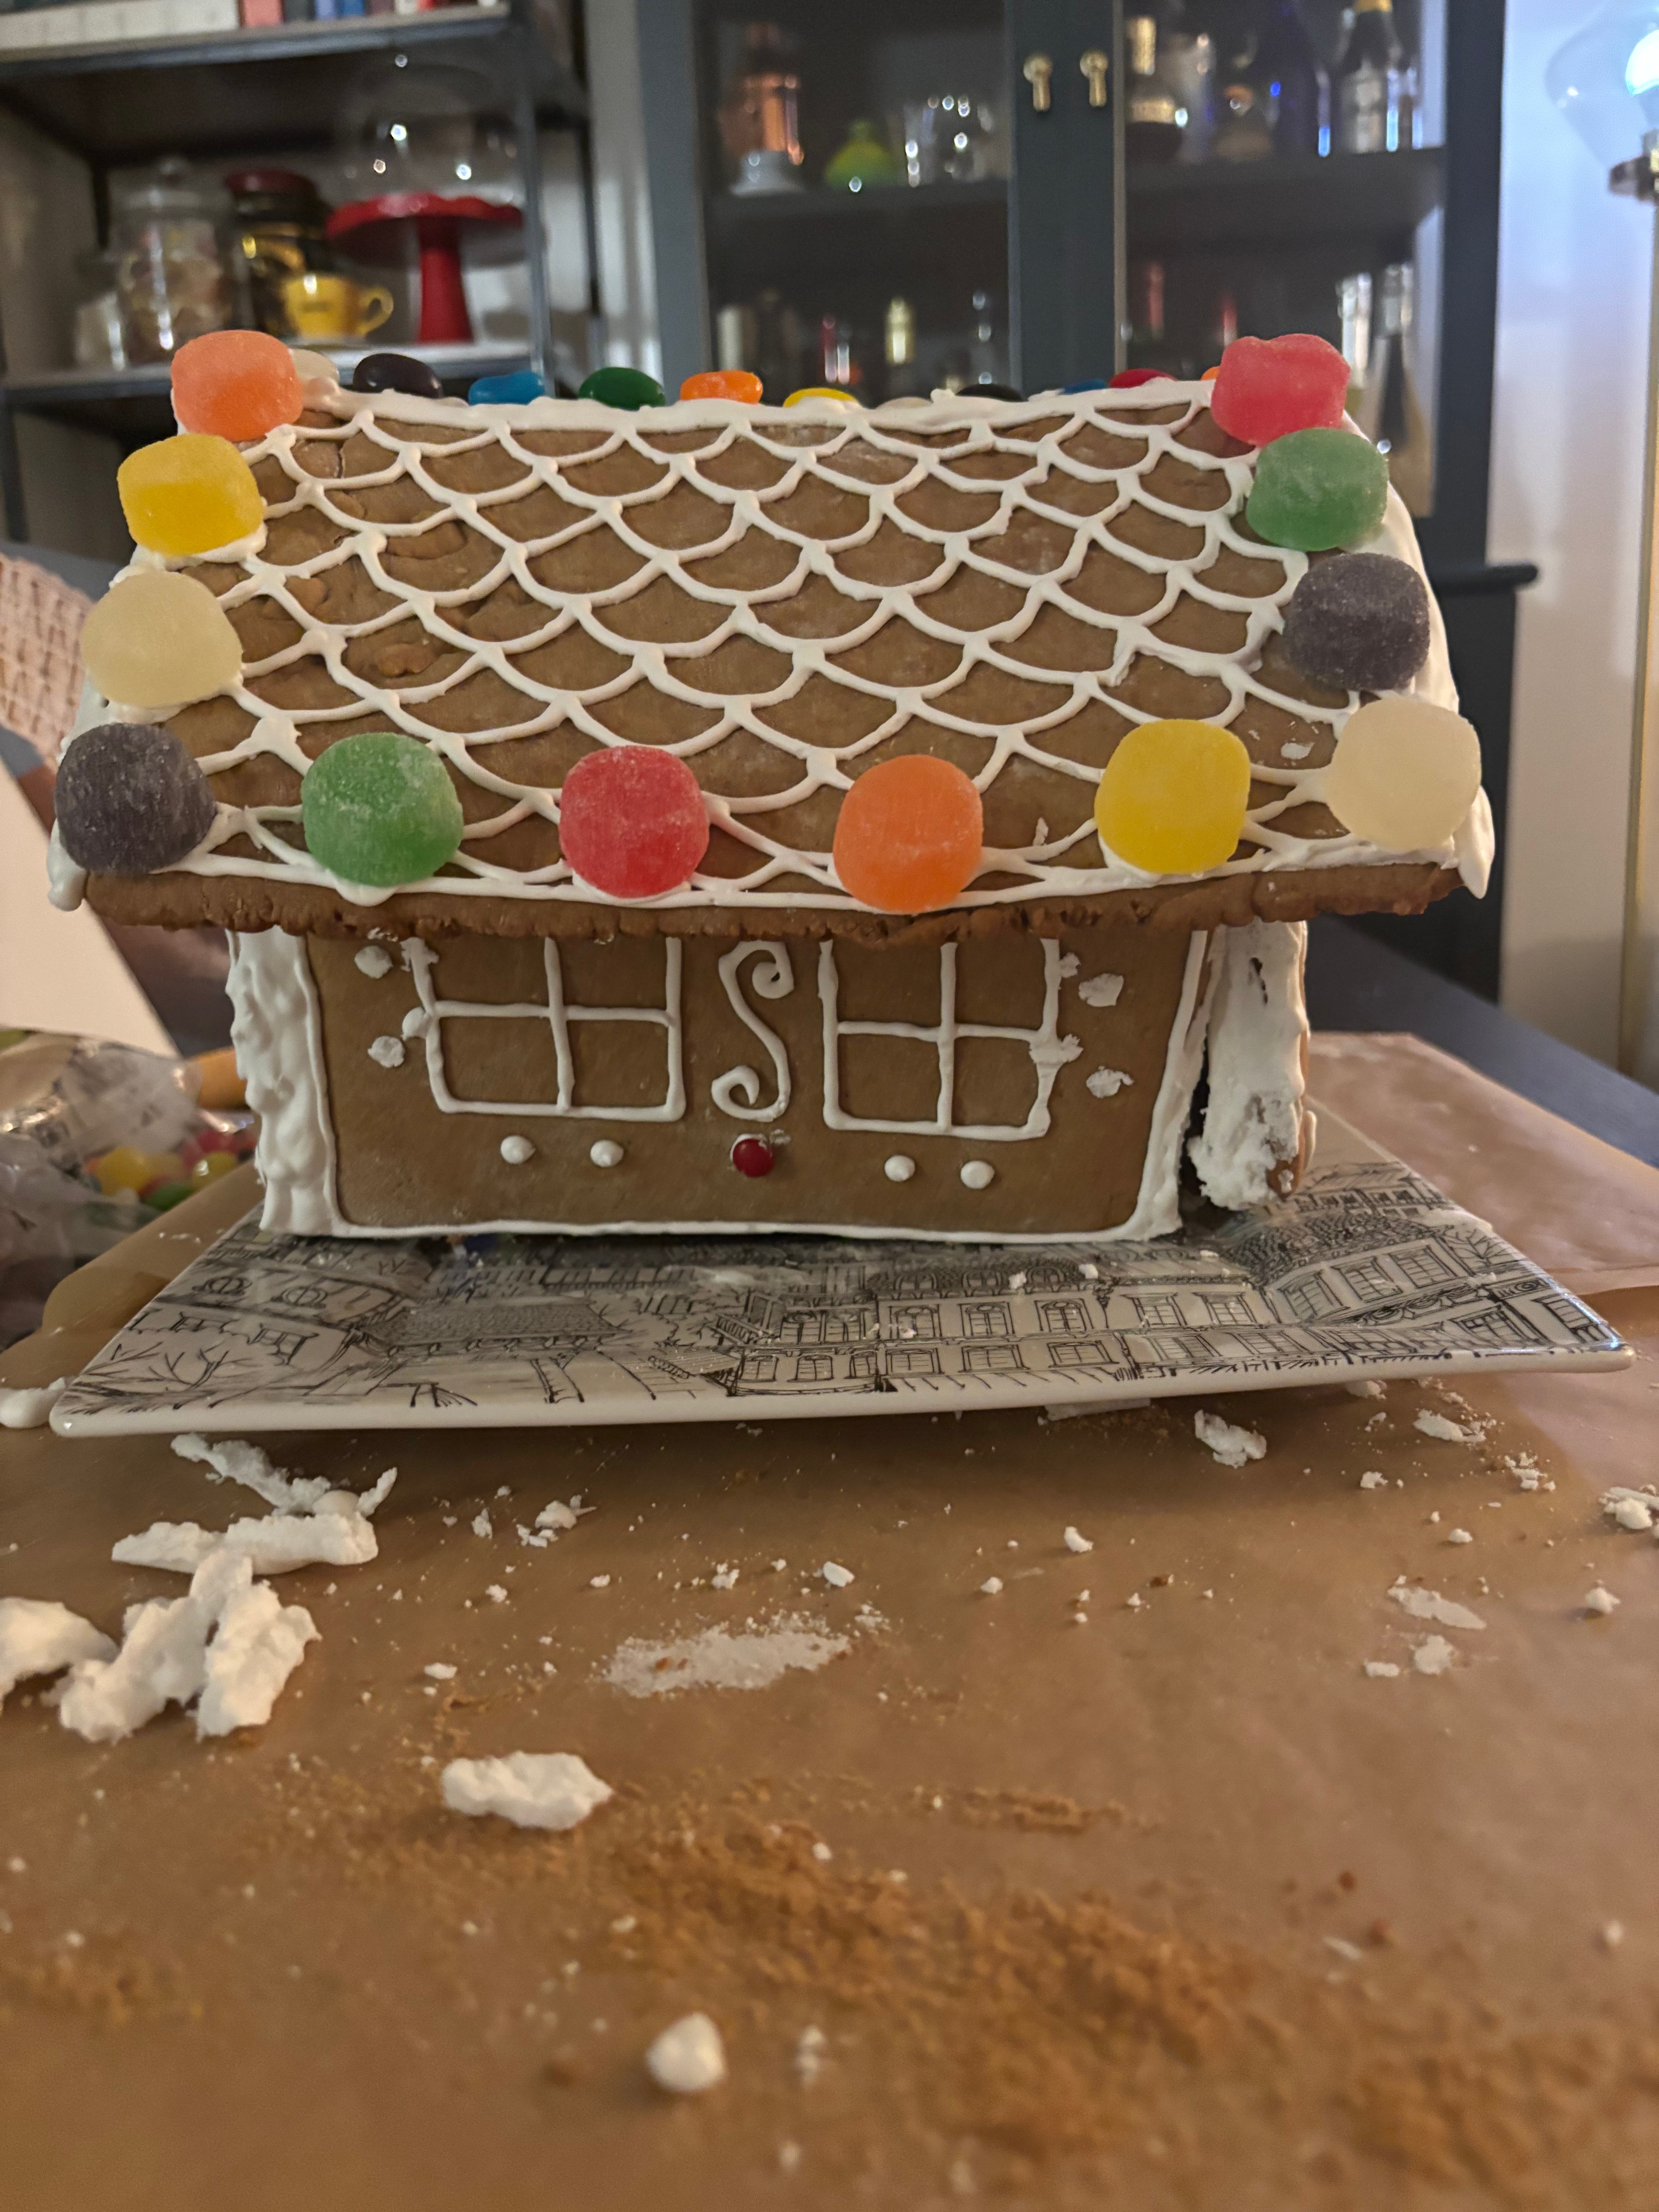
I have wanted to make a gingerbread house for a very long time, many years, but somehow never got around to it. Not even those pre-baked ones that come in a kit. To me that is a perfect representation of the holidays and all the baking and cooking entitled. So finally this holiday season I attempted this quaint gingerbread house recipe with my toddler. She loves baking and cooking with me so the baking itself went perfectly well but the assembly was… interesting. Very hard to gently and precisely apply royal icing to hold everything together and make cute decorations with a toddler excitedly moving next to you. Nonetheless it was very fun to do together and adding the candies were of course her favorite part. It was a really fun holiday day bake to do together and I would do it again without hesitation.
It was the first time I made a gingerbread house so I didn’t know what I was doing at all, but now I have learned a few things. I definitely made each panel of the house too thick, so next time I should roll it out a bit more. I was actually worried that they would be too thin, but they did bulk up a bit in the oven. I also think I slightly underbaked them as it seems that it should be a bit more golden-brown. Now the structural integrity of our house is dubious at best, but I think that is mainly due to the loaf pan I used to pencil out the templates as described in the recipe. My particular pan has a lip all around the top so I think it affected the ratios, and as a result the roof pieces could not lean on most of the side pieces properly. No matter, I filled all the holes with as much Royal icing as possible and tried to make it look like snow, so it turned out good enough. I’m honestly just surprised the house was able to stand up by itself!
Ingredient for structure:
- 2 recipes Maple Gingerbread Cutout cookie dough, shaped into 3 discs, wrapped and chilled
Ingredients for royal icing:
- 2 egg whites
- 2 cups icing sugar, sifted
- 1 tablespoon white corn syrup
- 1 teaspoon lemon juice
Tools for assembly:
- 9×5-inch loaf pan, ideally with angled sides
- Ruler
- Piping bag
- Small plain tip
- Icing sugar, for dusting
Directions:
- Preheat the oven to 325°F and line 3 baking trays with parchment paper.
- On a lightly floured surface, roll out the first disc of gingerbread cookie dough into a rectangle about 20 inches by 10 inches, and ¼ inch thick. Place the top of your loaf pan onto the dough and cut around the edge of the loaf pan to cut out two 9×5-inch rectangles. These are the two roof pieces. Place these onto a baking tray and bake for about 20 minutes, until they begin to brown around the edges. The gingerbread pieces should become firm after they cool, but if they still feel soft at that point you can return them to the oven to bake for another 5-7 minutes.
- Repeat step 2, but this time use the bottom part of the loaf pan to trace two 8×4-inch rectangles from the dough. These are the long sides to your house. Place these on the next baking tray and bake for just under 20 minutes, until they begin to brown around the edges.
- Make a template for the two end pieces of the house. Repeat step 2, but now cut out two end pieces to the house using the template you drew, see note below. Place these on the third baking tray and, if you wish, cut out 8 small rectangles from the remaining dough to be window shutters. Bake the end pieces for about 18 minutes and the small rectangles for about 12 minutes, until they just begin to brown around the edges. Let all the house pieces cool completely before assembling.
- To make your template for the front and back pieces of the house, trace the end of your loaf pan onto a piece of paper, it will be 5 inches on top, 4 inches on the bottom and will slope along the sides. Find the centre of the top side, measure a point 3 ½ inches straight up from the centre, and draw lines from this point to the two ends of the top line to form a triangle. Now you have a template to cut out and trace, and the end pieces will fit with the side and roof pieces.
- For the royal icing, whip the egg whites with a hand or stand mixer fitted with a paddle attachment just to loosen them. Add the icing sugar, corn syrup and lemon juice, and beat first on low speed to blend well. then on high until the royal icing is white and fluffy, about 5 minutes.
- Note: keep the icing well covered while assembling the gingerbread house. Do not refrigerate.
- To assemble the gingerbread house, first paint the decor on each piece of the gingerbread house, this is easiest to do before the house gets assembled. To do so, fill a piping bag fitted with a plain tip with royal icing. Pipe a roof design on the two largest pieces, adhering the shutters on an angle using the royal icing. Pipe doors and other desired details on the end pieces. Let the icing dry for at least 2 hours.
- Next, assemble the sides of the house. Pipe royal icing on each edge and stick the side pieces together. You may wish to carefully prop a book against each side to hold it in place as it dries for 2 hours.
- Lastly, place the roof on the house. Pipe royal icing around the top edges of the assembled sides of the house and place each roof piece on top. Pipe a line of royal icing to join the two roof pieces together and let this dry for 2 hours. Stacking a couple of books under the rood edges will hold them in place as they dry.
- Once dried, the gingerbread house can be moved to a presentation board and dusted with icing sugar, or you van add additional candy items to it, if you so desire. The gingerbread house will keep, uncovered, for up to a week and still be edible, and will keep for up to a month if only used for decor.
Happy baking!
Valerie

Nice work, Valerie. A gingerbread house takes a great deal of patience, but that is a quality you have in large supply, I suspect. Keep up the good work!
~ Anna
Thank you so much Anna!
In Germany they are also called witch’s houses, after a very well-known fairy tale by the Brothers Grimm.
Oh I love that! I had no clue. Hansel and Gretel I presume?
The candidate has 100 points!